Duct Tape Rose

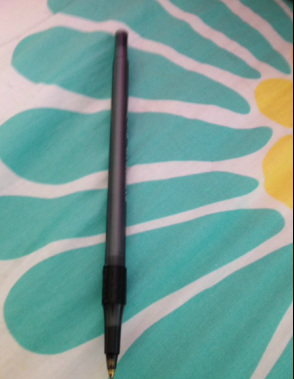
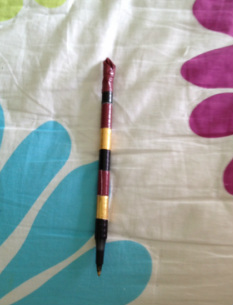
I've been doing the duct tape rose for a couple of years now because it's so easy and cute! You can simply do a rose with a straw and some duct tape but my favorite thing to do is put the rose on a pen and use it at school. I get tons of comments on them and people are always asking me to make them some! What they don't understand is it's super dee duper easy. In the picture on the right you will see the supplies I used. I chose three colors (you can do as many or as little as you want) gold, black, and maroon for my school colors. Just a 99 cent black pen and some titanium scissors.
Step 1
First I covered the entire pen in stripes of my school colors in the first picture you can see about the size I used for the stripes. If you don't like the stripes you can always use just plain green duct tape but I prefer the stripes for this rose. I did a pattern all up and down the pen. You just wrap the sticky side of the tape around the pen easy. Then you repeat and you have finished the stem!

Step 2
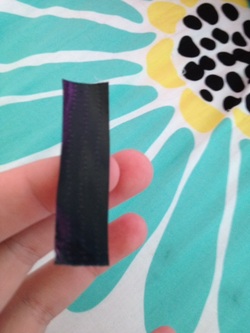
Next you begin the petals. The petals are also super easy all you do is use your scissors to cut about an inch long piece of tape. Then you make the first fold.
First Fold
With the first fold you just bend it over and leave a little sticky on both sides.
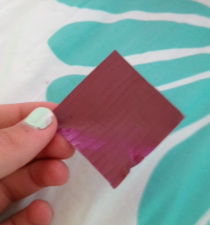
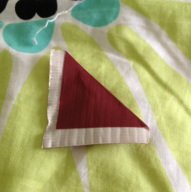
Second and final fold
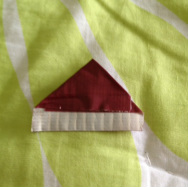
Next you fold one of the sticky sides over so that it is in a triangle form with a little sticky on the flat part.
Step 3
Next you have to repeat step 2 over and over again I did 10 petals per color so 30 petals total. However about 20 petals is usually about perfect for a rose.
Step 4
For the final step you have to take all your petals and wrap all of them around the stem over and over I like to spread the colors around but you could do stripes or whatever you can think of.
Completion
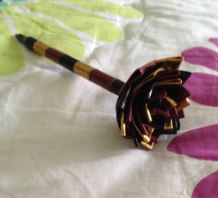
And wala you have a beautiful rose pen your friends are sure to love!
